Materials
I Hook
Any color worsted weight yarn
Scissors
Place marker(s)
Abbreviations
Ch: Chain
Hdc: Double crochet
Sc: Single crochet
Sl st: Slip stitch
St(s): Stitch(es)
Sk: Skip
Pattern Notes
The initial increase round (Rounds 1-6) are made by joining the last hdc to the initial ch 2 with a sl st. Starting in round 7 you will begin working in a spiral. This means you will not join your rounds. The number in the parenthesis at the end of any step indicate the total numbers of stitches
you should have at the end of the round.
Pattern
To Start: Ch 4, join with a sl st to make a circle.
Round 1: Ch 2, 9 Hdc in circle, join. (10)
Round 2: Ch 2, Hdc in same st; *2 Hdc in next st*, repeat * around., join. (20)
Round 3: Ch 2, Hdc in same st; *Hdc in next st, 2 hdc in next st*, repeat * around, join. (30)
Round 4: Ch 2, Hdc in same st; *Hdc in next 2 sts, 2 hdc in next st*, repeat * around, join. (40)
Round 5: Ch 2, Hdc in same st; *Hdc in next 3 sts, 2 hdc in next st*, repeat * around, join. (50)
Round 6: Ch 2, Hdc in same st; *Hdc in next 4 sts, 2 hdc in next st*, repeat * around, join. (60)
From this point on you will be working in a spiral. It is a good idea to put a place marker in the Ch 1 space indicated below. A place marker helps you to know when you’ve completed a round. If you do have a place marker you can always use a safety pin, paper clip, or contrasting piece of yarn.
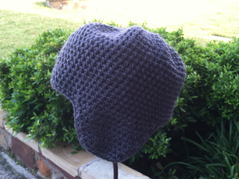
Round 7-20: Ch 1, *Hdc in next st*, repeat * around. (Remember do not join!)
Do not fasten off!
Now, it’s time to make the first ear flap…We will be working in rows (back & forth) to make the ear flap. Here we go!
Row 1: Sl in next st; Hdc in next 16 sts; sl in next st. (18)
Row 2: Ch 1, turn; Sk first st, Hdc in next 16 sts. (16)
Row 3: Ch 1, turn; Sk first st, Hdc in next 13 sts, Sk next st, Hdc in next st. (14)
Row 4: Ch 1, turn; Hdc in each st across. (14)
Row 5: Ch 1, turn; Sk first st, Hdc in next 11 sts, Sk next st, Hdc in next st. (12)
Row 6: Ch 1, turn; Hdc in each st across. (12)
Row 7: Ch 1, turn; Sk first st, Hdc in next 9 sts, Sk next st, Hdc in next st. (10)
Row 8: Ch 1, turn; Hdc in each st across. (10)
Row 9: Ch 1, turn; Sk first st, Hdc in next 7 sts, Sk next st, Hdc in next st. (8)
Row 10: Ch 1, turn; Hdc in each st across. (8)
Do not fasten off!
Turn your work on its side and begin putting a sc in each st around. When you reach the other side of your hat (where you need to begin your second ear flap)…stop...You could count the sts from point A to point B, but eyeballing it will pretty much get you to the same place. I lie mine flat with the flap I’ve already made facing down & take note of where I should start my second flap.
Second ear flap time!
Row 1: Sl in next st; Hdc in next 16 sts; sl in next st. (18)
Row 2: Ch 1, turn; Sk first st, Hdc in next 16 sts. (16)
Row 3: Ch 1, turn; Sk first st, Hdc in next 13 sts, Sk next st, Hdc in next st. (14)
Row 4: Ch 1, turn; Hdc in each st across. (14)
Row 5: Ch 1, turn; Sk first st, Hdc in next 11 sts, Sk next st, Hdc in next st. (12)
Row 6: Ch 1, turn; Hdc in each st across. (12)
Row 7: Ch 1, turn; Sk first st, Hdc in next 9 sts, Sk next st, Hdc in next st. (10)
Row 8: Ch 1, turn; Hdc in each st across. (10)
Row 9: Ch 1, turn; Sk first st, Hdc in next 7 sts, Sk next st, Hdc in next st. (8)
Row 10: Ch 1, turn; Hdc in each st across. (8)
Do not fasten off!
I Hook
Any color worsted weight yarn
Scissors
Place marker(s)
Abbreviations
Ch: Chain
Hdc: Double crochet
Sc: Single crochet
Sl st: Slip stitch
St(s): Stitch(es)
Sk: Skip
Pattern Notes
The initial increase round (Rounds 1-6) are made by joining the last hdc to the initial ch 2 with a sl st. Starting in round 7 you will begin working in a spiral. This means you will not join your rounds. The number in the parenthesis at the end of any step indicate the total numbers of stitches
you should have at the end of the round.
Pattern
To Start: Ch 4, join with a sl st to make a circle.
Round 1: Ch 2, 9 Hdc in circle, join. (10)
Round 2: Ch 2, Hdc in same st; *2 Hdc in next st*, repeat * around., join. (20)
Round 3: Ch 2, Hdc in same st; *Hdc in next st, 2 hdc in next st*, repeat * around, join. (30)
Round 4: Ch 2, Hdc in same st; *Hdc in next 2 sts, 2 hdc in next st*, repeat * around, join. (40)
Round 5: Ch 2, Hdc in same st; *Hdc in next 3 sts, 2 hdc in next st*, repeat * around, join. (50)
Round 6: Ch 2, Hdc in same st; *Hdc in next 4 sts, 2 hdc in next st*, repeat * around, join. (60)
From this point on you will be working in a spiral. It is a good idea to put a place marker in the Ch 1 space indicated below. A place marker helps you to know when you’ve completed a round. If you do have a place marker you can always use a safety pin, paper clip, or contrasting piece of yarn.
Round 7-20: Ch 1, *Hdc in next st*, repeat * around. (Remember do not join!)
Do not fasten off!
Now, it’s time to make the first ear flap…We will be working in rows (back & forth) to make the ear flap. Here we go!
Row 1: Sl in next st; Hdc in next 16 sts; sl in next st. (18)
Row 2: Ch 1, turn; Sk first st, Hdc in next 16 sts. (16)
Row 3: Ch 1, turn; Sk first st, Hdc in next 13 sts, Sk next st, Hdc in next st. (14)
Row 4: Ch 1, turn; Hdc in each st across. (14)
Row 5: Ch 1, turn; Sk first st, Hdc in next 11 sts, Sk next st, Hdc in next st. (12)
Row 6: Ch 1, turn; Hdc in each st across. (12)
Row 7: Ch 1, turn; Sk first st, Hdc in next 9 sts, Sk next st, Hdc in next st. (10)
Row 8: Ch 1, turn; Hdc in each st across. (10)
Row 9: Ch 1, turn; Sk first st, Hdc in next 7 sts, Sk next st, Hdc in next st. (8)
Row 10: Ch 1, turn; Hdc in each st across. (8)
Do not fasten off!
Turn your work on its side and begin putting a sc in each st around. When you reach the other side of your hat (where you need to begin your second ear flap)…stop...You could count the sts from point A to point B, but eyeballing it will pretty much get you to the same place. I lie mine flat with the flap I’ve already made facing down & take note of where I should start my second flap.
Second ear flap time!
Row 1: Sl in next st; Hdc in next 16 sts; sl in next st. (18)
Row 2: Ch 1, turn; Sk first st, Hdc in next 16 sts. (16)
Row 3: Ch 1, turn; Sk first st, Hdc in next 13 sts, Sk next st, Hdc in next st. (14)
Row 4: Ch 1, turn; Hdc in each st across. (14)
Row 5: Ch 1, turn; Sk first st, Hdc in next 11 sts, Sk next st, Hdc in next st. (12)
Row 6: Ch 1, turn; Hdc in each st across. (12)
Row 7: Ch 1, turn; Sk first st, Hdc in next 9 sts, Sk next st, Hdc in next st. (10)
Row 8: Ch 1, turn; Hdc in each st across. (10)
Row 9: Ch 1, turn; Sk first st, Hdc in next 7 sts, Sk next st, Hdc in next st. (8)
Row 10: Ch 1, turn; Hdc in each st across. (8)
Do not fasten off!
|
Turn your work on its side, & you will, again, put a sc in each st all the way around your hat. Once you have reached your starting point
fasten off & weave in ends. . |
|
|
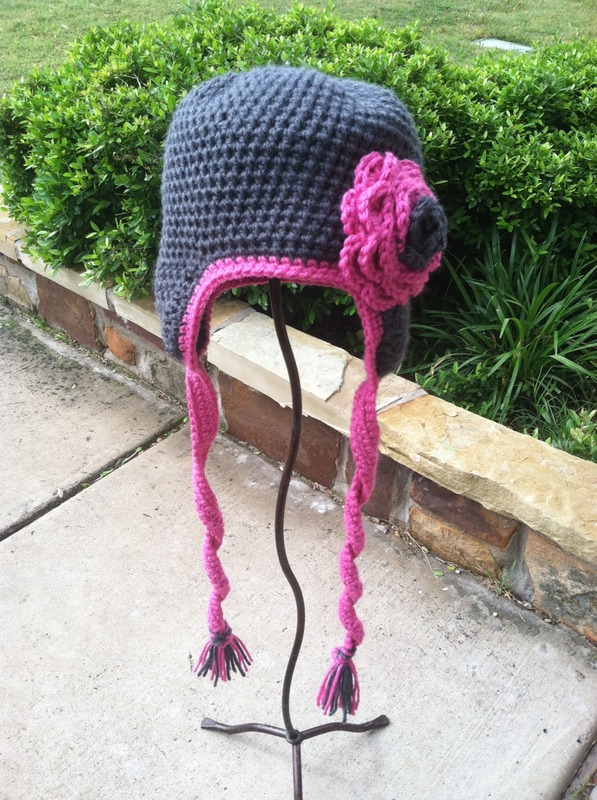
To add a border and “tails”…
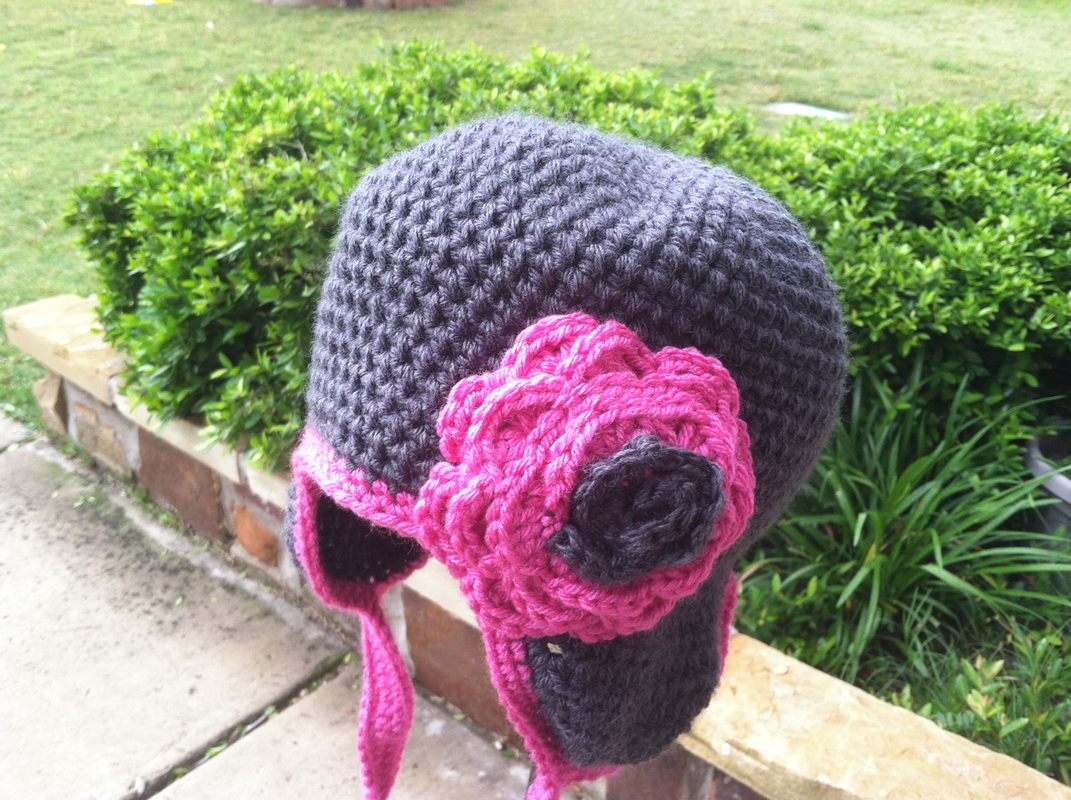
To start: Decide which side of your hat will be the front. Pick a starting point on the back of the hat and begin putting a sc in each st around until you reach the middle of your first ear flap. From there ch 51. Hdc in second ch from the hook & each ch thereafter. When you have reach the hat again, sc in the last st you sc in. Continue sc in each st until you reach the middle of your second flap. Ch 51, Hdc in second ch from the hook & each ch thereafter. Sc again in the same st on the hat & continue sc around, again, to your first ear flap. Sc in each hdc, putting 3 sc in the end/tip of the tail. Sc in each st up the other side of the tail. Continue sc in each st until you reach your second flap. Sc in each hdc, putting 3 sc in the end/tip of the tail. Sc up the other side of the second tail. Continue sc until you have reached your original starting point. Fasten off & weave in ends. Add tassels and/or a flower if you desire. Enjoy! |
